
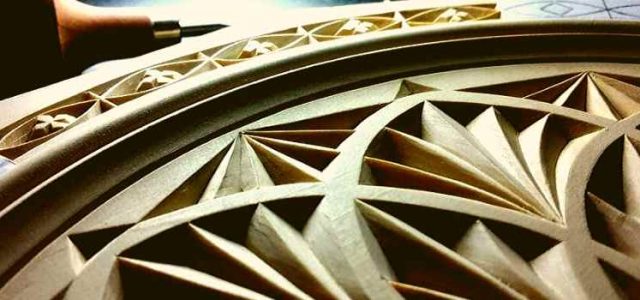
![Wood Lathe Projects for Beginners [Wood Turning Video Guide]](https://bestwoodcarvingtool.com/wp-content/uploads/2021/10/wlppr-970x350.jpg)
![Wood Lathe Projects for Beginners [Wood Turning Video Guide]](https://bestwoodcarvingtool.com/wp-content/uploads/2021/10/wlppr-750x350.jpg)
Wood Lathe Projects for Beginners [Wood Turning Video Guide]
Wood Carving Projects 22.10.2021 Jeff Richardson 0
![Wood Lathe Projects for Beginners [Wood Turning Video Guide]](https://bestwoodcarvingtool.com/wp-content/uploads/2021/10/wlppr-1024x500.jpg)
Greetings woodcarvers! Today I prepared for you a special compilation of video tutorials, to give you an idea of how amazing designs a lathe can help you make.
Lathes are power machines that hold and spin a chunk of wood, as the carver shapes them with a chisel or a gouge. The idea is to make a completely symmetrical design. Also, carvers use lathes to process larger pieces of wood.
In the article you are about to read, you will find 20 tutorials I found interesting and useful for those willing to experiment with these great tools. I sorted them starting from the simplest one, and ending with those you might need some practice for. In any case, if you are a beginner, don’t worry, as none of these tutorials is too hard to make.
Before the tutorials, I would like to say a couple of words about the wood types and tools you might encounter in the videos.
Wood Types
As you will see, carvers there use many types of wood for making different kinds of objects.
Although the wood types might seem a bit confusing to a beginner, actually it is simple. Woodcarvers classify all types of wood into two main categories: softwoods and hardwoods. Generally, the former tend to be softer and therefore easier to process (although not all of them), and the latter can be hard on the hand but are also quite resistant and solid. But, every species has its own specific characteristics. It takes some time to get to know different species from the perspective of carving.
Hardwoods
In the videos that I put on this list, carvers mostly used hardwoods. That’s because I chose projects meant for lathes, and when they work with power tools, carvers usually opt for hardwoods. And when they use power tools, carvers have a chance to process them more easily and get durable products.
So, speaking of hardwoods appearing in the tutorials, you will see a great variety. Hazelnut is quite expensive because it is very resistant and is often used for making tool handles and other practical utilities. Fruit trees, such as applewood, ashwood, cherry, cherry plum are very sturdy and are processed mostly by power tools. Also, we shape fruit trees usually before they dry out, as then they are very hard.
Finally, there are some species of hardwoods that are particularly sturdy and hard to shape, but provide amazing colors, grain structure, and are very good quality materials. Ironwood, oakwood, and hickory are among the wood types hardest to carve. They will make your knives dull very easily and are not the best material for objects that are in contact with liquids, as they soak water very easily.
Some tutorials mention less popular hardwoods, such as honey locust and boxelder. Honey locust is a very durable material, traditionally used for building fences. Boxelder is a popular material for making small furniture. However, it can cause allergies, it is not recommended for objects that come into close contact with people, such as toys or kitchen utilities.
Softwoods
Cedar is a rare example of softwoods in these tutorials. It is among the softest carving woods but is very resistant to moisture, so it is recommended for objects such as bottles, boats, and similar.
Tools Used
This time, I focused on projects involving lathes. Lathes are power tools, meaning that they need an active power supply to run. Their purpose is to only spin the wood, while the carver stands by with a chisel or a gouge, making a symmetrical cut. In case you wonder where to find the best wood lathe, I have already written about it on this blog so feel free to check it out.
You will see that carvers have various types of chucks installed on their lathes. We use chucks to hold different types of objects centered. Some of the most popular models are three-jaw, collet, and magnetic chucks. However, there are also drill chucks, which may be used to assist in holding straight shank drills tap, or reamer to facilitate the drilling, reaming or tapping.
Other tools you will need for performing the projects from the following list comprise standard equipment for working with lathes. First and foremost, you will need a set of wood carving chisels and gouges, in various sizes and forms, depending on the project.
Other than that, to split larger pieces of wood, a hand saw, scroll saw or a bandsaw will be necessary. As I find scroll saws very useful for any professional woodcarver workshop, so I made a review of the best scroll saw models, according to my opinion. They are great tools if you want to make some amazing designs more easily and much more quickly.
For other types of coarser work, a grinder and a drill with various bit sizes and types can be useful. For detailed work, you might want to have some carbide tools (diamond, square and round-shaped).
Once done with turning and shaping, sandpaper, sanding disks or benchtop sanders will make the surface of your artwork nice and sleek. For most of the projects on my list, simple sandpaper (of different roughness), will suffice. As I use them on a daily basis, I thought it would be useful for beginners to share my experience, so I summarized my thoughts in the best sandpapers for wood smoothening post. However, in case you decide to take your sanding to another level, check out my top benchtop sanders review for some recommendations.
Finally, for giving your projects a final touch, various kinds of oil finishes (beeswax, teak oil, Danish oil, etc.) are going to make your project look just the way it should. In case you would like to know more, I have a detailed guide on how to stain wood.
Other useful accessories are glue, pens, and, of course, protective equipment (masks, gloves, and similar).
In the following list of wood lathe video tutorials, we will check different design ideas. So let’s get started!
Easy Wood Turning Lathe Project – Handles
As I promised, we will start with the simplest one. What you will see in this video is how you can use a lathe to make handles for your workshop hardware. Once you have a lathe, you can make your favorite old tools useful again!
I think it’s a great idea for young woodcarvers to start discovering the craft by making something useful. Once an object such as a spoon or handle is made, it builds their sense of contributing to the household, and it is a great motivation to keep working, at least it was for me.
In case you are working with a wooden chunk that is a bit old, you could use the penetrating epoxy to soften the wood a bit.
Wood Turning the Holy Grail
In this video, you will see how to make a wooden cup. And as it was suggested in the Indiana Jones movies, don’t expect the Holy Grail to be something extravagant. It is a beautiful and yet simple goblet. Watch it come to life from a coarse piece of wood.
Finally, in case you wish to follow the tutorial to the very end, make sure to have some golden leaves and glue to stick them to the inner space of the cup.
What’s particularly interesting in this tutorial is to see how artistic woodcarving can be. Although the cup was just created, it looks ancient.
Turning a Wood Lighthouse
A lighthouse is definitely not a common motive for woodcarving projects, so here’s one for those who like to be original.
Other than standard carving tools, you will need some leftover metal sticks, jewels, and a lot of imagination to make this one. If you want to make it truly genuine, you will need some knowledge of electricity as well.
What I particularly liked about this tutorial is that it shows how we can turn any piece of wood into craftwork, even the imperfect ones. You can see how the carver uses glue and residue sawdust to fill the holes and cracks in the surface of the wood.
Easy Vase Woodturning Project
This is a great project for those who have a shop and need to boost sales quickly. The carver performing this tutorial promises these vases to bring great profits, according to his experience. And as I said, anything properly made of wood that is at the same time practical is always going to be a great selling product.
Woods he used are ironwood and applewood, both hardwoods. Now, regarding ironwood, it is interesting to know that it is the hardest known wood in the world, native to Australia. So in case you can’t find ironwood, you can substitute it with any other hardwood available on our market.
Woodturning – From Plank to Plate
Here’s a great project for those who have an old plank of wood they would like to recycle and make something new out of it. And again, since it results in a plate that could be a decoration as well as a fruit bowl, it is a project with a strong selling potential.
Although making a plate sounds simple, you will need quite some equipment to make this one properly. Apart from the lathe and a standard chisel set, you will need a drill and a grinder.
Woodturning – The Water Bottle
Another example of practical utility you can make with a lathe. Using a lathe with some drill chucks, this man shows that carving a water bottle isn’t that simple, but is most definitely worth it.
What is important, however, is the finishing part. As this object is supposed to get in contact with water very often, it is important to protect the wood properly with a food-safe coating. The outside is also protected with the safe varnish.
To tell the truth, this is a bit harder project, as some parts such as the lid require very precise work. However, beginners don’t give up! The only way to fail it is to not even try.
Woodturning – a Striped Bowl
Making this bowl resembles the process of making the plate in another example in this list. What is creative about this one is that a man found a way to make a bowl out of a number of straight planks.
By using standard wood glue to bring them together, he carves out a bowl with interesting striped surface.
Woodturning – A Little Something Different
Out of an oak wood chunk, the craftsmen makes a three-legged stool for his little boy.
To make this beautiful gift, he uses a lathe and chisels, but also a bandsaw to cut bigger pieces of wood. He uses sanders and sandpaper to smooth the surface. To do the same, you will need some glue, to stick the legs to the sitting part.
Woodturning Christmas Tree – Easy Project
Here’s another great gift idea! If you wish to surprise someone for the next Christmas and show your woodcarving skills at the same time, then this is a perfect project idea for you.
The things you will need are a piece of wood, a lathe, and some chisels. The rest is your patience and imagination!
To finish the project, as usual, some sandpapers and oil will do the job.
However, I have a disclaimer to make about this tutorial. Never wear any kind of jewelry while turning! The man in the video must be a very experienced carver as he is brave enough to wear a watch. It is very dangerous to have any jewelry while turning, especially those loosely hanging (necklaces and similar), or even loose clothes. If the jewels wind up in the lathe, severe injuries can happen.
Woodturning – Oak Whistle
Making musical instruments has always been a special challenge for woodcarvers. They are very tricky to make. It is very important which type of wood you use. But even more importantly, the carver has to know a lot about acoustics and he/she has to be very, very precise.
On the other hand – no one here expects perfection anyway! If you are intrigued, go for it. It might not be successful the first time, but give yourself time to learn.
So, this whistle is made of an oak tree and takes only 10 minutes to make. A chisel, a hand saw, some cutting knives, and sandpaper are all the equipment required.
And again – don’t ever wear a watch while turning!
Easy Woodturning Projects: The Basic Goblet
If you’re not so much into Holy Grail, but rather need a small goblet for tasting some stronger spirits, this is a project for you.
Cherry tree is perfect for this purpose, as it has wonderful color and is very durable.
My personal tip here is to let your imagination go when it comes to the foot. There are no rules there, just let your hand play with the detailers, making original shapes and layers.
Easy Woodturning Projects: tea light candle holders
Out of three little chunks of hardwood, you can easily make candle holders. You will first use chisels to rough chunks round. Then, using a drill, you will need to make a hole in the wood, for the tea candle to fit.
Then comes the creative part of the job, as you are free to shape the outer side however you see fit. You can use the tutorial for basic ideas, but feel free to experiment. You can make them all the same, or try to carve out each holder in a different shape. Use diamond, square, and round-shaped carbide tools for detailed work.
If you want the smooth and glossy surface, coat the holders with some finishing oil.
Easy Woodturning Projects: Spinning Tops
If there are any lucid dreamers among you, then here’s a perfect project for you! If you watched the movie Inception, you’ll know what I mean. Spinning tops are symbols of lucid, highly realistic dreams, because they tell the difference between the dream and reality. In dreams – they never stop spinning!
Also, spinning tops have been favorite toys for children for centuries, which makes them an excellent gift to your kid, grandson or a younger cousin.
With a couple of pieces of hardwood (maple, for example), using a spindle roughing gouge and a lathe with several types of chucks, you can make this magical toy yourself. To make it even more beautiful, use some wood dye or simple school markers.
Great Wood Turning Gift – A Small Bowl
Easy Beginner Wood Turning Project – A Lidded Pot
This one is also easy, but it looks awesome. A colleague from Australia shows you how to make a lidded pot out of red cedar.
You will of course first make the pot, and then work on the lid. Although simple, this project requires very curved edges, which will take some additional lathe chunks to hold, and a lot of sanding.
In order to make the pot, the carver uses a lathe and several types of turning chucks. Also, he uses a bandsaw and a spiral cutter head benchtop jointer, which makes curved planks nice and straight.
The top of the lid is quite interesting. You can see how nice it looks when we combine wood with some synthetic material (acrylic pen blanks).
Making A Simple Mallet – Lathe Turning Project
I would recommend this project especially to those who are fans of recycling and turning waste into something new. They say that reusing old things is the future, so here’s a good sustainability idea!
In this tutorial, you will learn how to make a mallet. You will turn a piece of wood on a lathe to make a handle, and use an old screw as the head.
Making Leatherworking Tools
Here’s a great example of how different crafts can help eachother out! This tutorial shows how you can use a lathe to repurpose a failed chisel handle into a handle for tools for leather processing.
Pay attention to the handle design. It has several ribs, to prevent slipping of the tool. I think it is a great idea.
How To Make A Wood Mallet
Now, if you are into mallets but want to stick exclusively to the wood, here’s one for you. Making a hammer like this one requires carving the head and the handle separately.
Try to make the handle as ergonomic as possible, so that it is comfortable to hold and grip. As for the wood, use the hardest type you can find for this tool.
How To Turn Your First Bowl
As already seen in another project I listed here, a bowl can be made of several planks glued together. In a very detailed tutorial, you will see all stages of how to make this bowl, which will turn out to have very peculiar patterns.
Because of its wacky look, it will most certainly catch an eye of a buyer. At the same time, it is easy to make and supports reusing some old pieces of wood or remainings you weren’t sure what to do with. Therefore, it is an excellent turning project if you want to attract more customers to your shop and boost sales.
Woodturning – Penguins from scrap wood
Going to a birthday party of an old friend and you have no idea what to buy? Why not quickly make a penguin from a block of scrap wood? This will certainly make your friend smile – who would expect such a gift! And at the same time, you can show how hard you work to learn to use your new lathe.
Notice that you can combine different types of wood. Here, a wood with lighter color was glued to the darker one, to imitate the white and black colors penguins have in the front and in the back.
Final Thoughts
It’s amazing to realize that, as a woodcarver, you can never run out of amazing gifts for holidays, birthdays, and anniversaries. I believe that lathes offer unlimited opportunities for creativity, apart from being very useful tools. In my wood lathe projects gallery, you can see how amazing works of art can be made with this tool.
In case you would like to take a rest from noisy power tools, find some more inspiration in my list of wood carving projects for beginners. Most of them are easy to make and you can carve them with your hands only.
Jeff Richardson Editor
Passionate about wood carving since high school. Always been able to relax while carving. 7 years ago, I decided to dedicate my whole time to wood carving; this is when I started my blog. I am a fan of DIY, fitness, and crafts. Also, I love to spend time with my friends, carving something out of wood. I hope you enjoy my articles.
Related Posts
All You Need To Know About Chip Carving
Christmas Gifts for a Woodcarver & Wood Carving Ideas for Christmas
Christmas Time is in the Air. Time to start getting prepared. In the article you’ll find ideas for christmas gifts for a woodcarver.
No comments so far.
Be first to leave comment below.