
Crafting Nature’s Bounty: Sculpting Techniques and Tips for Wooden Fruit Bowls
No Category 17.02.2024 Irene Richardson 0

Crafting the Bounty of Nature: Techniques and Tips for Sculpting Wooden Fruit Bowls
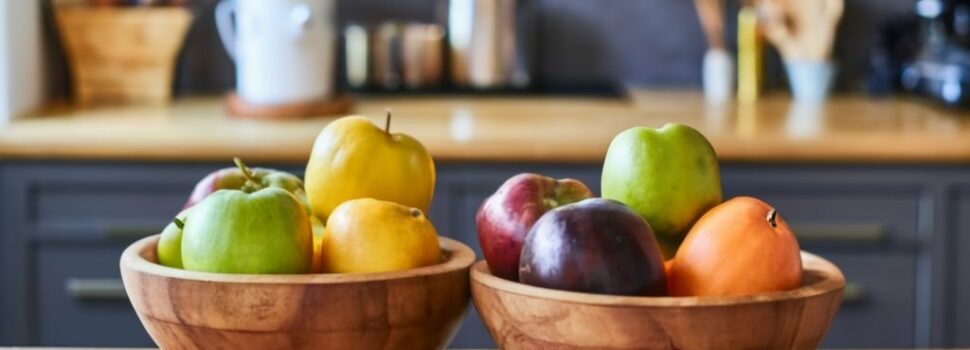
In the modern world, saturated with mass-produced goods, an inherent allure exists in crafting your unique wooden fruit bowl. Beyond mere functionality, a handcrafted fruit bowl brings a personal touch and a cosy atmosphere to any kitchen or dining area. Sculpting a wooden fruit bowl becomes a journey, allowing artisans to tap into nature’s abundance, and shape raw timber into functional art pieces. This comprehensive guide aims to demystify the intricate realm of sculpting techniques, providing invaluable insights into creating stunning wooden fruit bowls that honour the beauty of natural materials.
1. Choosing the Optimal Timber for Wooden Fruit Bowls
Creating a wooden fruit bowl commences with the meticulous selection of timber for the project. Each type of wood possesses distinct characteristics that influence the overall appearance and durability of the final product. Let’s explore the nuances of different wood varieties and the factors to consider when selecting the perfect timber for your fruit bowl.
Exploring the Unique Characteristics of Various Wood Varieties
Crafting wooden fruit bowls offers many options for wood species, each with its unique grain pattern, colour, and hardness. Oak, revered for its strength and resilience, emerges as a preferred choice capable of enduring daily use. With its light hue and refined grain, Maple exudes an air of sophistication. Cherry wood boasts a rich, reddish-brown hue that ages gracefully, adding a timeless charm to any kitchen. Conversely, walnut wood, known for its deep, luxurious tones and fine grain, imparts a sense of luxury and warmth to a fruit bowl.
Considerations for Durability and Aesthetic Appeal
When deliberating on timber for your fruit bowl, it’s essential to consider both durability and visual appeal. Hardwoods like oak and walnut are durable, making them ideal for crafting practical kitchenware. However, the softer beauty of cherry and Maple, characterized by delicate grains and warm tones, presents an equally attractive option. Consider the intended use of the fruit bowl and your personal aesthetic preferences when making your timber selection.
2. Essential Tools and Equipment for Sculpting Wooden Fruit Bowls
Sculpting a wooden fruit bowl requires various hand tools and power equipment to achieve precision and intricacy in design. Explore the tools, safety measures, and protective gear for a successful sculpting endeavour.
Overview of Essential Tools: Chisels, Gouges, and Carving Blades
Hand tools play a crucial role in shaping and refining wooden fruit bowls. Chisels, gouges, and carving blades are indispensable for material removal and intricate detailing. Available in various shapes and sizes, chisels enable the carving of broad contours and fine lines alike. Gouges are invaluable for hollowing out the bowl’s interior and creating smooth curves while carving blades provide finesse and precision in crafting delicate features.
Selection of Suitable Power Tools: Bandsaws, Sanders, and Rotary Tools
While hand tools are essential, power tools expedite sculpting, resulting in smoother outcomes. Bandsaws are particularly useful for initial shaping, swiftly removing excess material. Sanders, including belt and orbital types, excels in refining surfaces and correcting imperfections. Rotary tools with carving attachments offer versatility and precision in creating intricate designs.
Implementation of Safety Precautions and Protective Gear
Prioritizing safety is paramount when embarking on the sculpting of wooden fruit bowls. Familiarize yourself with the operation and safety features of tools and equipment. Wear protective gear such as safety goggles, gloves, and dust masks to shield against airborne wood particles. Maintain a well-ventilated workspace free of clutter to reduce the risk of accidents. Ensure tools are sharp and well-maintained to prevent slipping or kickback during use.
3. Sculpting Techniques for Crafting Wooden Fruit Bowls
Armed with the necessary tools and equipment, it’s time to explore sculpting techniques for conceptualizing and shaping wooden fruit bowls. From carving the bowl’s core to adding intricate embellishments, let’s uncover the multifaceted aspects of sculpting to breathe life into your vision.
Carving and Shaping the Bowl’s Core
Begin by outlining the basic silhouette of the fruit bowl using a bandsaw or carving blade. Focus on removing excess material and shaping the bowl’s core to the desired dimensions. Pay attention to curves, angles, and proportions to achieve a harmonious and visually appealing form. Once the initial contour is established, use gouges and chisels to refine edges and correct any irregularities.
Adding Intricate Embellishments: Leaves, Stems, and Fruit Patterns
Next, enhance your fruit bowl with decorative motifs such as leaves, stems, and patterns. Start with simple designs, gradually progressing to more intricate patterns as your skills and confidence grow. Experiment with various carving techniques, including relief and chip carving, to add depth and dimension to your design. Practice patience and precision, taking breaks as needed to rest and refocus.
Creating Texture and Dimension
Consider adding texture and dimension to your fruit bowl design to enhance its visual appeal. Use carving tools to create subtle surface textures, such as stippling, gouging, and cross-hatching, to add depth and contrast to the wood. Experiment with different finishes and techniques to highlight the natural grain pattern of the wood, creating visual interest. Don’t be afraid to explore unconventional sculpting methods to produce a fruit bowl design that is uniquely yours.
4. Finishing and Protecting Your Wooden Fruit Bowl
After completing the sculpting phase, applying the finishing touches to your wooden fruit bowl to protect its beauty and durability is essential. Let’s explore the various finishing options, application methods, and strategies for safeguarding the wood against moisture and abrasion while storing it in your kitchen cabinets.
Choosing the Right Finish: Oil, Wax, or Varnish
When selecting a finish for your wooden fruit bowl, consider the options available, each with its advantages and aesthetic appeal. Oil finishes, such as tung or linseed oil, penetrate the wood to nourish and protect it from within, providing a natural matte finish. Wax finishes offer a subtle, protective layer that enhances the wood’s natural colour and grain. Varnish provides a durable, glossy finish, highlighting the wood’s beauty and protecting against scratches and stains. Consider your desired aesthetic, level of protection, and maintenance requirements when choosing the right finish for your fruit bowl.
Applying the Finish
Before applying the finish, ensure that the surface of the fruit bowl is clean, dry, and free of debris. Use a soft cloth or brush to remove any remaining particles, then wipe the surface with a damp cloth to remove any residue. Apply the finish in thin, even layers, following the direction of the wood grain, and allow each coat to dry completely before applying the next layer. Use a brush, foam applicator, or spray gun for precise application, avoiding drips or puddles—sand between coats to smooth out imperfections and achieve a professional finish.
Protecting Against Moisture and Abrasion
In addition to applying a finish, it’s essential to protect the wood against moisture and wear to prolong the life of your fruit bowl. Seal the underside of the bowl with a waterproof sealant or adhesive to prevent moisture from seeping in and causing damage. Attach felt pads or rubber feet to the base of the bowl to protect delicate surfaces and avoid scratching. Store the fruit bowl in a cool, dry place away from direct sunlight and moisture to preserve its beauty and integrity.
5. Advanced Techniques and Creative Ideas for Wooden Fruit Bowl Crafting
Having mastered the basic sculpting techniques, it’s time to explore advanced strategies and innovative ideas to take your wooden fruit bowl crafting to the next level. From experimenting with mixed wood compositions and decorative inlays to incorporating unique elements like wood burning and painting, unleash your creativity and create fruit bowl designs that stand out from the crowd.
Exploring Mixed Wood Compositions and Inlays
Elevate your fruit bowl design by incorporating mixed wood compositions and intricate inlays into your repertoire. Experiment with contrasting wood colours, grains, and textures to create striking patterns and arrangements. Consider using exotic wood species or reclaimed timber to add character and sustainability to your creation. Integrate decorative inlays such as metallic accents, coloured epoxy resin, or natural embellishments like shells and stones to add depth and interest to your fruit bowl design. Let your imagination run wild as you explore new possibilities and push the boundaries of traditional woodworking.
Adding Decorative Accents: Pyrography and Paint Techniques
Enhance the charm and individuality of your wooden fruit bowl by adding decorative accents such as pyrography and paint. Pyrography, or wood burning, allows you to create intricate designs and patterns on the surface of the wood using a heated tool. Experiment with different tips and techniques to achieve varying levels of detail and shading, from bold lines to subtle gradients. Alternatively, unleash your artistic flair by embellishing your fruit bowl with acrylic or oil-based paints to add colour and vibrancy. Use stencils, stamps, or freehand techniques to create custom designs and patterns that reflect your style and aesthetic preferences.
Customizing Your Fruit Bowl Design for Unique Appeal
Make your wooden fruit bowl your own by adding custom elements and unique embellishments. Consider incorporating symbolic symbols, initials, or monograms to add a personal touch and commemorate special occasions. Create custom patterns or motifs inspired by your hobbies, interests, or life experiences to infuse your fruit bowl with personality and charm. Invite friends and family to join you in brainstorming sessions to create collaborative works of art that celebrate creativity and camaraderie. Embrace the beauty of imperfection, knowing that each fruit bowl is a unique expression of craftsmanship and individuality.
Conclusion
Sculpting wooden fruit bowls goes beyond mere craftsmanship, allowing artisans to showcase their creativity and skill. By carefully selecting timber, mastering sculpting techniques, and applying meticulous finishes, you can create exquisite fruit bowls that bring warmth and beauty to any space. So, grab your tools, unleash your creativity, and embark on a woodworking adventure full of endless possibilities!
Irene Richardson
Woodcarver with 10+ years of experience. Was working in the woodworking niche for 5 years. Hates - Chinese mass-produced tools Loves - High-quality wood carving knives and chisels In our team, she is focused on chip carving. Knows where to get a lot of free chip carving patterns

No comments so far.
Be first to leave comment below.